
Remembering John Rendall…..
September 1, 2023
MF 5
October 27, 2023How to change wrist seals on the KUBI fitted cuff system.
Introduction
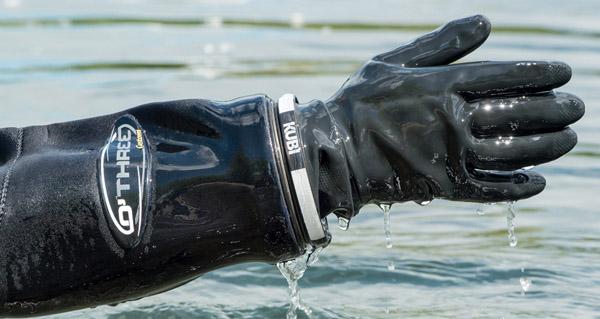
Changing a wrist seal on the KUBI Dry Glove Fitted Cuff System is a relatively straightforward process, but it requires some careful steps to ensure a proper seal and to maintain the integrity of the system.
Here’s a step-by-step guide on how to change a wrist seal on the KUBI Dry Glove Fitted Cuff System.
Just before we start it’s worth mentioning at this point that the O-Rings on this system are colour coded:
- Black O-rings are securing components or locking them together and they come in 2 different thickness.
- Fixing rings are thicker than the locking rings.
- The red O-rings on the system are sealing rings, these are working to keep the system (and you!) dry.
Materials You Will Need
Steps 1 & 2
Step 1: Remove the Cuff ring.
- To do this you need to pry of the locking O-ring that holds the internal cuff ring to the fitting ring. This will detach the two rings allowing you push the internal ring back through the arm of the dry suit. Voila, the rings should be now separated and you will be ready for step 2.
Step 2: Remove the Old Wrist Seal
- First of all we need to removed the damaged or old seal. To do this the fixing ring that attaches the wrist seal of choice must be removed and this allows the wrist seal to be pulled off. in the video below, the fixing does come off when pulling the wrist seal off.
- After removing the old seal, use a clean cloth or paper towel to wipe the cuff ring thoroughly and remove any residue or debris. Ensure that the cuff ring is dry and free of any contaminants.
Step 3
Step 3: Install the New Wrist Seal
- Inspect the replacement wrist seal to ensure there are no defects or damage. If it appears to be in good condition, you’re ready to proceed. Please follow step 2 for latex and silicone wrist seals and step 3 for neoprene wrist seals.
- Neoprene Wrist Seals: Neoprene wrist seals for the KUBI fitted system need an additional set up procedure because they will only seal on side of the material unlike silicone or latex. Its nothing too complicated but can have dire consequences of a leaking system if not followed correctly. When prepping a neoprene wrist seal to be replaced we recommend turning it inside out so that the out nylon is on the inside.As you will see in the video the fixing O-ring is then placed about 2.5cm into the widest point of the wrist seal and the excess skirt is tucked over the O-ring internally. Once this is stretched over the cuff ring the wrist seal gets pulled back through so that the nylon is back on the exterior of the seal. To make this as easy as possible, just like we have demonstrated its best to have 1 person stretching the wrist seal and O-ring with someone else having a firm grasp on the cuff ring… Time to get your dive buddy on speed dial! Nylon is porous and will not seal again the cuff ring, this is why we turn it through and make seal on the smooth skinned material.
- Silicone and latex wrist seals: These are slightly easier than fitting a neoprene seal but in terms of warmth and durability Neoprene still comes out tops. You can set the wrist seal on to the cuff ring before fitting the fixing O-ring. Once you are happy with your orientation of the wrist seal you then need to stretch over the fixing O-Ring.
- Once the seal is in place, inspect it to ensure there are no visible wrinkles, creases, or areas where it’s not properly seated. Any creases can gently be pulled through to make the seal flush against the ring. Please be aware than pulling to hard can cause tears in the material and sometimes it better to admit defeat and try again.
Step 4
Step 4: Refitting the cuff to the suit.
- Now that the wrist that is fitted to the cuff ring we need to reattach to the drysuit.
- Before pushing the cuff back through the arm of the suit its always worth reapplying a small amount of NarkOx oil to the red O-Ring on the cuff side ring. Less is more in this case, make sure to spread the lubricant evenly with your thumb after applying around the whole circumference.
- Push the cuff side ring back through the arm of the suit and really make sure its pulled through as far as it will go. If the the cuff ring isn’t pulled through enough the locking ring that we took off first wont seat properly and risk coming off and causing the system to come dislodged.
- Reattach the fixing ring and give the system a nice firm push with your palms to ensure its seated correctly and isn’t going anywhere.
Step 5
Step 5: Final Checks
- Trim Excess Seal (if necessary): If there is excess seal material protruding from the cuff, carefully trim it with scissors to create a neat and clean finish.
- Dispose of Old Seal: Dispose of the old wrist seal properly, considering environmental guidelines for material disposal.
Now you’ve successfully changed the wrist seal on your KUBI Dry Glove Fitted Cuff System. Time to go diving! 🙂